Showing posts with label crafting. Show all posts

Saturday, September 15, 2012

yes. we're still alive...

....just busier than ever!!! Between school & ballet & homework.....finding the time to sit down & blog is pretty nonexistent.

Here's a small peek at what we've been up to these past few weeks......

we got to meet our new niece...ava was in LOVE & didn't want to put her down.....gryason on the other hand wasn't too sure what to think of her....

*
newest craft for the front door!!! i love it! and the colors are PERFECT for fall!

*
auburn game day shirts for the kids! i even tried my hand at bow making....and i have to say i'm pretty proud of myself for the bow i made for ava!!

*
ava passed out on the way to her first day of ballet for this year!! i must say.....i am VERY impressed with the dance company!! so glad we made the decision to change studios! i love my tiny dancer!

*
i decided to make some "no sew roman blinds" for the dining room doors. and OH.MY.GOSH! i love them! they make SUCH a difference in the morning! we're no longer blinded by the sun while we eat breakfast! i'm super proud of myself on this project because #1 i actually did it & #2 i only spend NINETEEN DOLLARS on it!! awesome!


*
 the past few weeks we have had an amazing amount of mushrooms that have been popping up in our front yard. it's pretty gross. about 2 hours after i took this picture, they doubled in size AND more came up!

*
oh how this boy makes me laugh! he's become SO much more vocal since ava has started school! 


Tuesday, August 21, 2012

"playroom" redo {before & after}

I FINALLY got around to putting my latest crafts on the wall upstairs. The only thing that's left to do is possibly find a replacement "toy box" or some sort of storage for the mounds of toys my five year old has accumulated in her little life. {my dad made one for ava's 1st birthday...it takes up a TON of space, is EXTREMELY heavy, & the lid is falling apart. awesome.}

So far, I'm pretty happy with the way the wall has turned out!!

{before}
kinda drab & not so kid friendly decor.


{after}
i must say. i'm proud of myself for redecorating the kids' play area upstairs. and. all for about $15! [gome!] i moved the off-white stars onto this weird wall between the bathroom door & grayson's bedroom. and the big swirly star thing is now on the weird wall next to the hvac unit. i'm still debating on if i want to revamp the stars with a little bit of paint.


**on a side note....my mom wanted me to make a koozie for one of her friends! apparently, her saying is "just one more" when they're out or having a get together! when you use that black fluffy stuff...spray it with a little bit of hairspray....it keeps it from going EVERYWHERE!!!**

Friday, August 17, 2012

"playroom" redo {update #1}

I can officially knock 1 1/2 projects off of my list for the kids "playroom" upstairs. I finished their monograms on canvas and got the board almost done to hang their artwork on. 

I say ALMOST done because the board that I ORIGINALLY wanted to do didn't turn out quite the way I had envisioned it to. {okay....NOTHING like what i had envisioned} When I wrote "Masterpieces" on it, in  my head it it looked awesome. Totally not the case when I held it up & actually looked at it. The letters first half of the word were nice & big & fairly even. But, as the word went on, the letters got smaller & smaller & somehow started to angle towards the top of the board. I tried sanding the letters off.....that was a mess. Oh, and, some of the clips i glued on fell off. BUMMER! Needless to say, it was a complete fail in the crafting department. I was ready to toss the board......

My mom gave me the idea to attach some string to the wall & use mini-clothespins to hang up their art. So, we ventured out to Hobby Lobby for some ideas. So, I got some plain wooden knob looking things & the mini-clothespins to paint. I'm still not 100% sure how I'm going to attach the knob thingies on the wall, but I'll figure it out! I plan on using either yarn or some black hemp cord stuff to string between the two knobs. I looked for something to hang above this....but couldn't find anything. 

Then it hit me. At 10:30 last night. I scrounged up some scrapbook paper that I had in my craft drawer & mod podged it onto the crappy looking board. Then, printed out the word "Masterpieces" in a cute font & TRACED it onto the dried board with a sharpie. The outline of the letters was a little sketchy, but gave me a good idea of where all the letters were supposed to be & they were all the same size & lined up neatly! I went over them with a black calligraphy paint pen. And I must say, I really like the way it turned out. Only one problem.........the notch in the back of the board is on the BOTTOM. I totally wrote on it upside-down. Seriously!? So. It looks like I'll be using on the of extra knobs & a little bit of ribbon to hang this sucker up. 


Now, I just need to figure out what color ribbon i want to use to hang it. I'm thinking either black or white. But that can wait until I get the knobs & clothespins done! I'm pretty happy with how everything has turned out so far!! Fingers crossed it all looks as good as I'm imagining it to!!

Hopefully my next crafty post will be of everything up on the wall! Fingers crossed for a cooperative Grayson!!

Friday, August 10, 2012

"playroom" redo {on the cheap}

I've fallen back into the grips of Pinterest. I was doing good at not spending hours on end looking at random things. And then my sister in law sent me a picture of a monogram that she made for her & my brother. Stupid me asked where she found it. I was then hooked. I am now wanting to decorate my house for fall & totally redecorate (and organize) the loft area upstairs. Getting back on Pinterest also made me want to go to Hobby Lobby. 

So. I've gotten a few ideas on what I want to do upstairs for the kids. There isn't very much space up there......but it's big enough for a few of G's bigger toys & A's massive toy box that my dad built. I hate the wall decor that I have up there now. Okay. I take that back. HATE is a strong word....I'm starting to "dislike" them. I want something that is kid friendly & gender neutral. 

{see. very BLAH. it looked good when the hubs desk was there. now...not so much!}

Here's what I've come up with : 

~ Canvas Monogram for each of them with their birth dates.

{So far I have the pages printed, mod podge, & blank 8 x 10 canvases. All that I need to do is attach the paper to the canvas & they'll be done! Easy Peasy!!}

~ Canvas Photo of each of them when they're around the same age. They both got AMAZING photos done when they were around 4-5 months old. So, I think I'm going to tackle making my own!!!
~ New toy storage.
~ Display for some of their art work. I LOVE this one.......


but don't really love the price ($57!!!). So, I decided to make my own. It's going to be my first project for the play area!        

       
I braved the lovely WalMart with both kids & picked up a few supplies. I spent UNDER $10! I already have an old wooden sign that I don't really like anymore & have tons of craft paint. So all I really needed was sandpaper, a paint marker, & the little clippy things. I didn't like that ones that were in the photo above because they didn't look like they would be easy to attach. Instead, I got the smaller ones that are attached to a magnet. I figured a little super glue or even hot glue would do the trick! 


My plan is to get started on this little project tomorrow. Along with the monograms! Fingers crossed it goes the way I want it to!!! I will post photos once they're done!


Friday, April 20, 2012

photo a day{april20:something you drew}

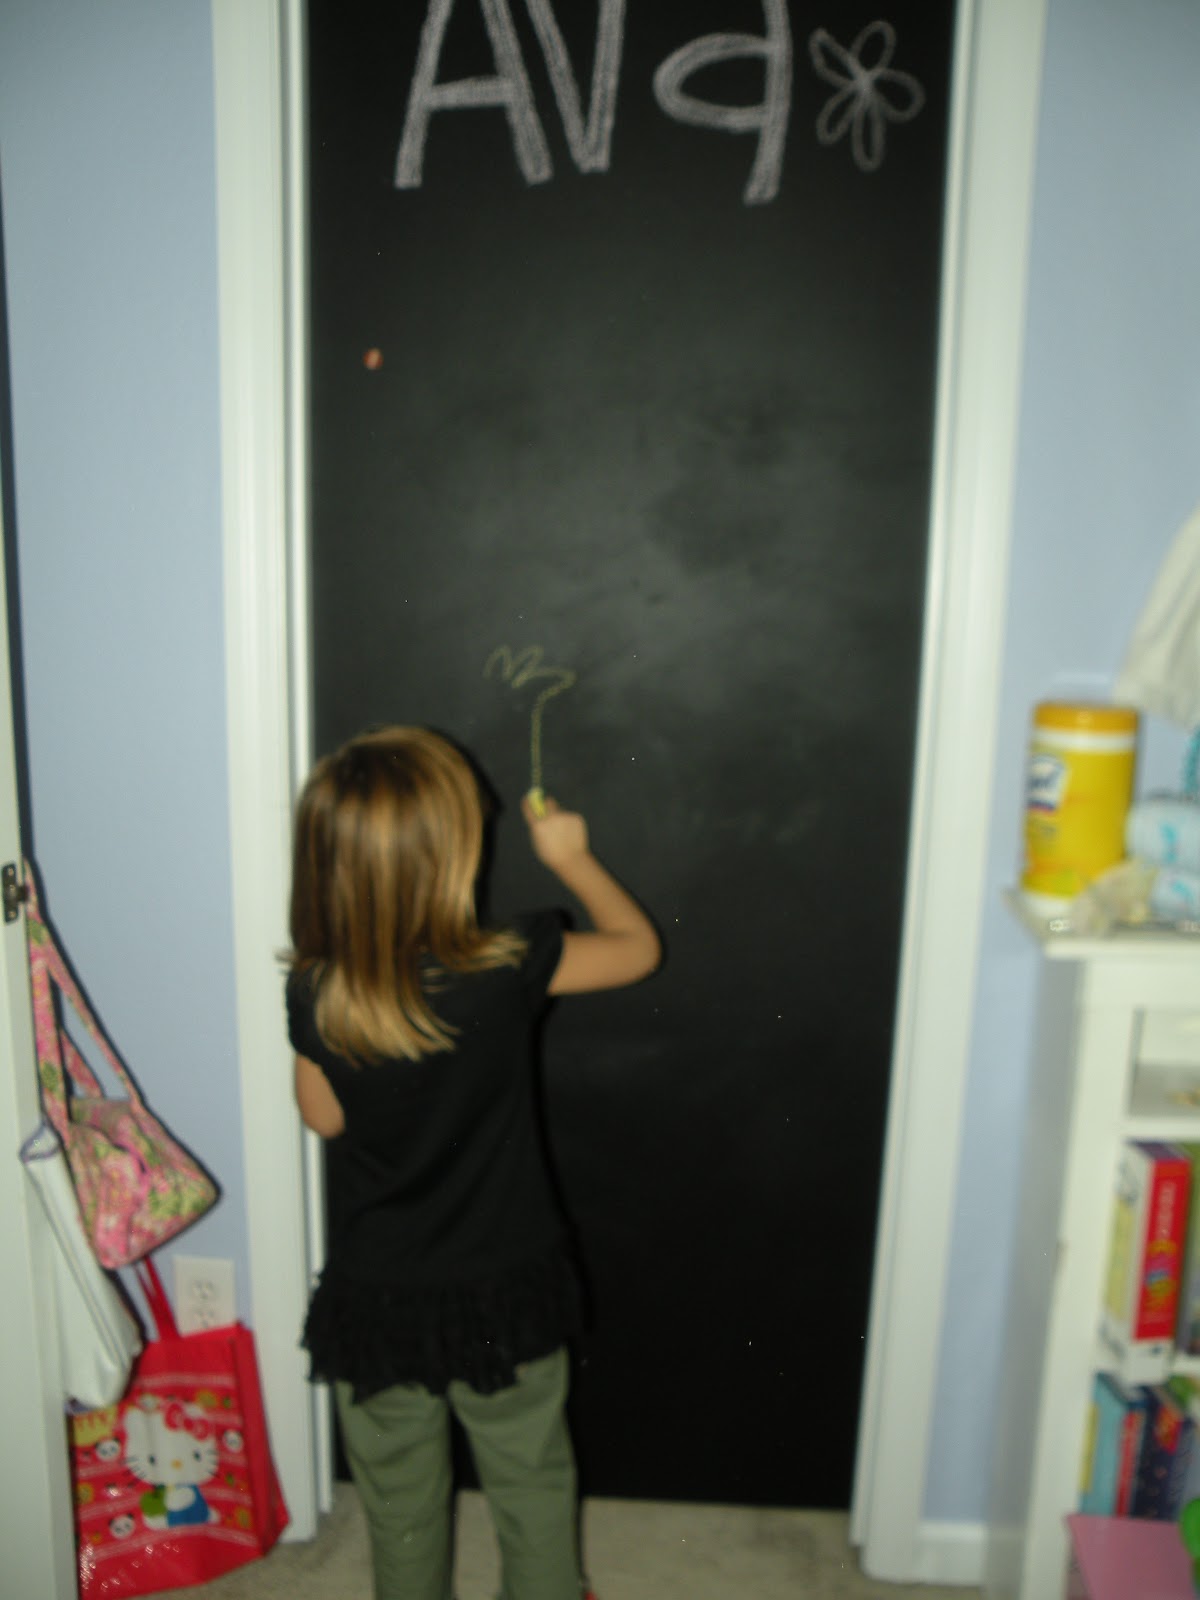
i am in love with my chalkboard creation on the pantry/laundry room door!!!

Friday, March 16, 2012

technology....you anger me.

so i had this really nice, LONG post about how i am in LOVE with chalkboard paint.....pictures & all. hit the save button. went to the kitchen to get coffee. came back. it was GONE. totally GONE. except for ONE picture. seriously!? my laptop was closed. my phone was with me. i have no idea what happened! gah. so frustrating!

so here's the quick version........

back in october i got the craft bug. big time. i wanted to create a chalkboard wall somewhere in our house. i thought about putting it upstairs on our 1/2 wall. but that would have required building a frame & mounting the frame, along with a huge piece of ply-board, on the wall. honestly, i didn't want to do all that work. i couldn't just paint a wall because we have textured walls. and i really don't think they'd be good for writing on with chalk. so, after looking at pinterest, i decided to do ava's closet door. she went to florida for a long weekend with my parents, so that was the perfect time to get it done. the hubs took the door off the hinges & i went to work. i used a can of magnetic paint first. and then applied 2 or 3 coats of chalkboard paint. and let me just say.....i LOVE it!! and so does ava! it's so fun to decorate it for the holiday's & leave her little notes! we even did her christmas countdown on her door! 

 *

well. i only used maybe 1/2 of the can of paint. and in maybe december or january, i got the bug to paint something else with the chalkboard paint! ava has a white table that my parents got her for christmas a few years ago. because it was white, it was starting to look dingy & had some nice crayon/marker spots that i couldn't get off for the life of me! so....i pulled out the can of paint & covered the top of the table! i left a little bit of a white boarder around it just because i didn't want it to look too dark. both ava & grayson like sitting at the table to draw! 


painting the table hardly used up any paint.....and again....this week.....i got the bug to paint something for my kitchen. i was thinking about doing a wooden sign to hang up on the pantry door for our weekly menu & any miscellaneous grocery items we would need. however, i had the hardest time finding exactly what i was looking for. so. i found a basket that we used for grayson's toys (when there were just a few!) that was the perfect size & shape that i was wanting. it was kind of an oblong oval. so i traced it directly onto the pantry door. painted it. and hated it. it looked like an egg. so then i made it into a rectangle. and i'm still not happy. i'm HOPING to find a thin frame to mount around it to give it some texture....or maybe even a vinyl wall sticker to go around it. it just looks so BLAH right now.


so there's my door. it just looks so plain. fingers crossed for a successful trip to hobby lobby tomorrow with the photographer friend!!!

Tuesday, February 21, 2012

Photography Backdrop Craft

A couple of months ago, I got a message from my amazing photographer friend, Jenny, asking if I could possibly make a "fabric garland" for her to use as a backdrop. I took one look at the picture she had sent me of what she wanted and jumped on the chance to make it! It was seriously one of the easiest projects I have taken on!! We spent a good two or more hours at the wonderful Hobby Lobby picking out our fabrics. I could not wait to get started!

We picked a morning for her & her son Christopher to come over so we could work on the backdrops (yes. i said BACKDROPS! we couldn't settle on fabric for just one...so we got enough supplies to make two large ones & two smaller ones!) Thankfully, Grayson napped the entire time Jenny & Christopher were here. We started at around 10:30 & finished up by 2pm.....we did take a break long enough to feed our starving children & to break up a few arguments! It didn't take nearly as long as I thought it would!

Last weekend, Jenny took some pictures of newborn twins....and used one of the smaller "basket garlands" I made. I am SO beyond anxious to see how they turn out!!! But, knowing Jenny, they will be anything short of amazing!


this one is my favorite.
we used two different cotton fabric patterns, brown tulle, & sage green burlap.

the colors in this one are so soft & feminine. it can be used for babies, engagements, or even wedding/bridal pictures. i just LOVE it! and the "basket garland" is just as amazing!

*
the second one we did, we used this AMAZING green fabric....and i honestly fell in love with it as soon as i saw it!!! i pretty much made jenny buy it!!!

with this one, we used our leftover tulle to break up some of the green fabric. we also used an ivory burlap to add some texture. this one turned out really good also!! it's feminine, but still somewhat masculine. i must say, i'm very proud of us for our creations!


Tuesday, February 7, 2012

Crafty Goodness

I have been SUPER busy with some craft projects lately! And I must say.....I have been thoroughly enjoying it!!!

Here's a little peek at what I have been working on!!

*


these first two pictures are fabric/ribbon garland that i made for the photographer friend (hint hint jenny....hurry up and make a blog!!) they turned out amazing!!! i'll do a full post on both of these mini ones & the two HUGE ones we spent pretty much all morning on yesterday! i can't wait to see them in use!!


*

i spent superbowl sunday working on some valentine's day shirts. and i must say, i absolutely LOVE the way they all turned out! all i have left is ava's! and IF i can find a shirt for grayson......i may have to whip one up for him! i can't wait to see the sweet girls wearing their pretty shirts! the two that match are for our neighbors daughter's emmy & ashley......and the the other one with the big "LOVE" on it is for the photographer's daughter, kenzie.


My next goal is to put together a "fan page" on Facebook. Everyone has been trying to get me to sell my crafts.....but it makes me nervous! The hubs even thinks it's a good idea! So, I guess after I get better pictures of my creations, I'll get started on that! The hardest part is coming up with prices for everything!

Thursday, January 19, 2012

What I'm working on......

I would like to thank my wonderful sister in law for introducing me to the wonderful world of Pinterest!! At first, I never really got it. Or think it was as wonderful as everyone made it out to be! Oh.My.Goodness. I think it's safe to say I have become quite addicted!! I got a TON of ideas for both kids birthday parties from Pinterest. I got a TON of holiday decorating ideas from Pinterest. And, I have even cooked quite a few recopies that I found on Pinterest!

I have always loved to do crafts and all that fun stuff. But lately, it's getting pretty intense! In the past few months, I have made five tutu's, six holiday/birthday shirts, and two bunting banners. I LOVE it! I even did a few painting projects for the kids bathroom & repainted Ava's table with some chalkboard paint. The husband (who is always full of wonderful ideas!!) thinks I should start selling the stuff I make. I would LOVE to, but there's just so many people in our area who do it already! But who knows.....maybe one of these days I'll start an Etsy shop!!

But for now.....here are a few of the projects I have started.

EASY centerpiece for the dining room table!
I already had the carafe. I used four different sized wooden dowels, foam hearts from WalMart, 2 bags of M&M's, ribbon, & of course, hot glue!
It seriously took me all of five minutes to put together!
Ava loved putting the sticks in the M&M's for me! I even caught her sneaking a few candies every now & then!!

*


This would be the start of Ava's Valentine's Day shirt! I have my fabric. And the plain shirt. Now I just need to figure out what I'm going to do!
I used this fabric to make a bunting banner for one of my wonderful friends to use as a photo prop!!! She seriously keeps me busy!! But I love it!
I see a visit to the amazing Hobby Lobby in my VERY near future......as in after my hair appointment tomorrow!!

*

And now for some past projects. I could honestly spend HOURS in Hobby Lobby. Hobby Lobby & Pinterest are a big part in my life. I don't know what I would do without them ;)


ava's shirt for gray's bday party......he has a matching one but with a "g".
my original plan for their shirts was to make my own transfer using picnik....yeah. that was a total failure!
so instead, i took some of the leftover fabric from his banner (the picture of that is down a little more) and made my very own applique!
i did a pretty awesome job hand sewing those suckers, if i must say so myself!!

*

some fun art to fill up empty wall space in the kids bathroom. right now, i have the canvas' hanging up with ribbon....but i'm thinking i may get some white frames to stick them in......i can't decide!

*

bunting banner i made for gray's birthday.
so.in.love with the way it turned out!
and yes.....it is all hand sewn! i have yet to convince the hubby to buy me a sewing machine!

*


a close up of one of the tutu's i made for my photographer friend!
LOVE the ribbon!

*

gray's thanksgiving shirt.
i found the idea on pinterest (duh!).... but it was a canvas.
the "body" of the turkey is g-man's foot!!
ava's shirt was the same...but with her big ol' foot!!

*

again....the tutu's i made for the photographer!

*

ava with her SUPER puffy "rapunzel" tutu & "rapunzel" hair!
she had on a shirt with rapunzel's crown on it...but imagine that...she was too busy for me to snap a good picture!!
i made her hair clip out of scrapbook flowers & curling ribbon. they were also party favors for all the girls that came!
they were a HUGE hit :)

*

and finally......ribbon streamers for on gray's highchair for his birthday party.
we did a pirate themed party.....and you wouldn't believe how hard it was to find pirate fabric & ribbon!!!
i was afraid it was going to be too girly.....but i guess it turned out alright!!